

"When you wash the rice, wash the rice; when you cut the carrots, cut the carrots; when you stir the soup, stir the soup." The Complete Tassjara Cookbook
I need to keep my mind on what I'm doing, when I'm doing it.
The recipe I used for a more traditional Irish Soda bread calls for 8 to 10 fluid oz of soured milk, but you only add 3/4 of that amount. While I hate recipes that specify to do that, I thought, "I'm just going to remember to only put in 3/4 C of liquid". By the time I got to that section of the recipe, my mind had slipped to other things: is the washing machine making a weird noise? Is it done with the towels? Are the boys really arguing *again*? What kind of cut should I get at my hair appointment today? Everything but the recipe I was making.
Sure enough, I dumped all the liquid into the dry mixture. Damn.
Then the "Great Rescue" begins - more flour, stir, more flour. I had gone so far as to try and shape it on the cookie sheet before admitting it needed more flour. Scraped off the parchment paper, back into the bowl, the whole time aware that the bread was losing the power of the baking soda/acid mix. For the extra 4 fl oz of liquid I added 1 1/4 C more flour. "When you wash the rice, wash the rice...."
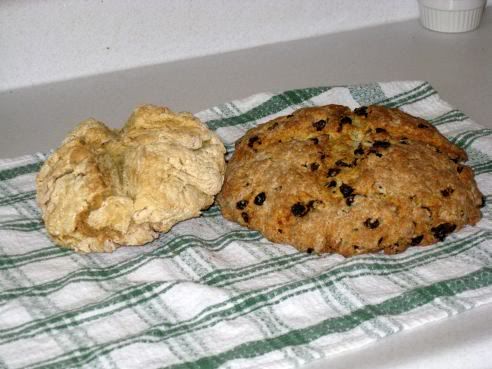
I decided to make two different kinds of Irish Soda Bread, one more traditional than the other. However, as I loathe caraway seeds, not a single seed came anywhere near the loaves. You could add them if you like, but ick.
Traditional Irish Soda Bread
I based it on the recipe here
3 1/2 cups cake flour (used 4 1/2 to correct mistake)
1 teaspoon sugar (optional: you can absolutely omit this if you prefer sugar free soda bread)
1 teaspoon salt
1 teaspoon baking soda
1 Tbs lemon juice
1 1/4 C milk
Sift the dry ingredients together at least once or twice to make sure the bicarbonate of soda is evenly distributed. Put the sifted dry ingredients in a good big bowl (you want stirring room) and make a well in the center. Pour about three-quarters of the sour milk in, and start stirring. You are trying to achieve a dough that is raggy and very soft, but the lumps and rags of it should look dryish and "floury", while still being extremely squishy if you poke them. Add more liquid sparingly if you think you need it. (You may need more or less according to conditions: local humidity and temperature, the absorptiveness of the flour you're using, etc.)
Blend quickly (but not too energetically!) until the whole mass of dough has become this raggy consistency. Then turn the contents of the bowl out immediately onto a lightly floured board or work surface, and start to knead.
The chief concern here is speed: the chemical reaction of the bicarb with the buttermilk started as soon as they met, and you want to get the bread into the oven while the reaction is still running on "high". Don't overknead! You do not want the traditional "smooth, elastic" ball of dough you would expect with a yeast bread. You simply want one that contains almost everything that went into the bowl, in one mostly cohesive lump. You should not spend more than half a minute or so kneading... the less time, the better. Fifteen seconds may well be enough, because you don't want to develop the gluten in the flour at all. If you do, you'll get a tough loaf. So don't overdo it! Don't be concerned if the dough is somewhat sticky: flour your hands, and the dough, and keep going as quickly as you can. There is a whole spectrum of "wetness" for soda bread dough in which it's possible to produce perfectly good results: farl in particular sometimes rises better if the dough is initially wet enough to be actively sticky. You may have to experiment a few times to come to recognize the right texture of dough.
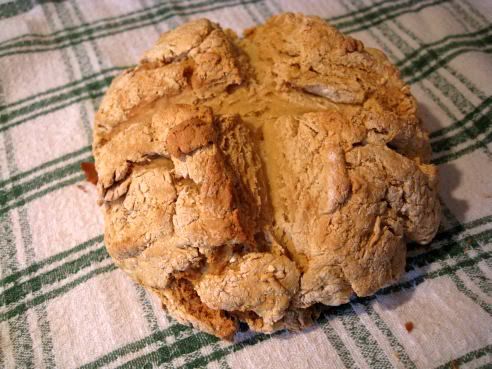
Flatten the lump of dough to a slightly domed circle or flat hemisphere about 6-8 inches in diameter, and put it on the baking sheet (which should be dusted lightly with flour first). Then use a very sharp knife to cut a cross right across the circle. The cuts should go about halfway down through the sides of the circle of dough, so that the loaf will "flower" properly.
Put the cake's baking sheet into the preheated oven. Handle it lightly and don't jar it: the CO2 bubbles in the dough are vulnerable at this point of the process.
Let the bread alone, and don't peek at it! It should bake for 10 minutes at 450°, then decrease to 400° for 35 minutes. Also, if you have a fan oven, use temperatures 10° lower or so, as fan ovens have a tendency to run hot.) At the end of 45 minutes, pick up the loaf and tap the bottom. A hollow-ish sound means it's done. For a very crunchy crust, put on a rack to cool. For a softer crust, as above, wrap the cake in a clean dishcloth as soon as it comes out of the oven.
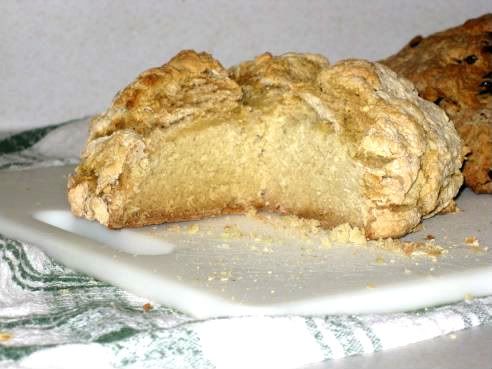
Taste verdict: it's best eaten with butter. The crumb is dense and the crust firm, despite being wrapped in a cotton dishtowel for an hour while cooling.
Raisin Currant Soda Bread
based on the recipe here
makes 2 loaves
2 1/2 cups all-purpose flour
1 1/2 teaspoons baking soda
1 tablespoon baking powder
1/2 teaspoon salt
3 tablespoons white sugar
1/2 cup butter, cut into pieces
1 cup raisins (I found the bag of raisins at the bottom of the pantry)
1/2 cup currants
2 teaspoons caraway seed (optional)
3/4 cup milk
3 tablespoons apple cider vinegar
Preheat oven to 400 degrees F (200 degrees C). Grease 2 baking sheets.
Stir together the flour, baking soda, baking powder, salt, and sugar in a large bowl until evenly blended. Cut in the butter using a pastry blender or your hands until the mixture resembles coarse cornmeal. Stir in the raisins, currants, and caraway seeds, then make a well in the centre and pour in the milk and vinegar. Stir with a spoon until the dry ingredients are moistened.
Turn the dough out onto a well floured work surface, and knead gently 8 to 10 times. Divide the dough into two balls, and place onto the prepared baking sheets.
Bake in preheated oven for 15 minutes, then reduce heat to 375 degrees F (190 degrees C), and bake until the top of the bread is golden brown, about 15 minutes more.
I made mine into 1 loaf, so baked it at 375 for 30 minutes.
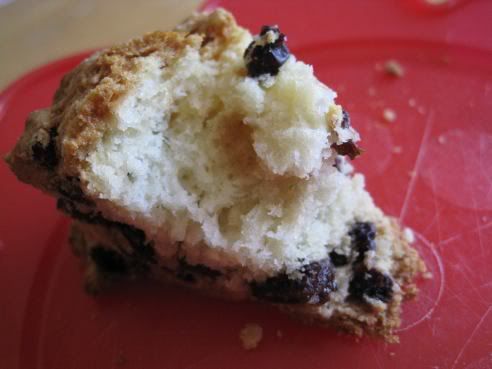
Taste verdict: It's like a nice raisin scone, tender and moist. The girls liked it!

My youngest came and and said "Mommy, what happened to those things?" pointing to the soda breads. I told him they were supposed to look like that, but I don't think he's convinced.
Added some new pictures
ReplyDelete