
- Degassing Bread Dough
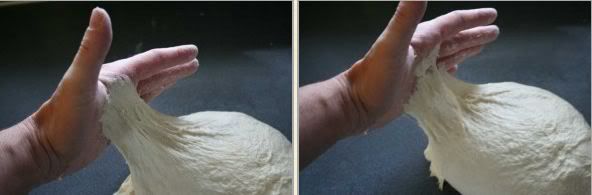
- Bread Dough Rips When Kneading
- Tacky, Not Sticky Dough
- Making Your Sourdough More Sour
Degassing Bread Dough
"First, we degas the dough. If the excess of carbon dioxide gas that is generated by the yeast is not periodically expelled, fermentation can be impaired." - Jeffrey Hamelman
I use the term "degas the dough" instead of "punch down the dough" or "knock back the dough". It may sound pretentious, but there are many ways to get the carbon dioxide the fermenting yeast produces out of the bread and it depends on what you prefer.
Some bakers have said that the dough is strengthened by literally "punching down" the dough in the bowl. However, in some loaves where you want a open crumb, that will remove many of your nice open bubbles.
Other bakers are fans of the fold method (I like that one myself), where you gently fold the dough like you would a letter or a piece of paper. An illustrated explanation can be found at Artisan Bread Baking or Wild Yeast Blog.
A third way to remove the gas is to turn it out onto your kneading surface and shape it into a rectangle, then either roll it with a rolling pin or dimple it with your fingers like you would for focaccia.
There are many pages on the 'net where you can find reasons for doing any of the techniques. If you like one, then use that one. I leave the choice up to you.
Why Bread Dough Tears and Rips While Kneading
I have a problem with my doughs ripping instead of stretching, even after I knead them and rise them. After some research, I found that this could be cause by two things.
The first is too much flour in the dough, the second is not kneading long enough.
If you suspect that you have added too much flour, spray your dough with a plant mister then knead the water into the dough. Continue to do this until you feel the dough is sufficiently hydrated.
The kneading issue is difficult as by hand a basic knead is 8 to 10 minutes. Ciril Hitz, in his book Artisan Breads, calls it a "short mix".
For some dough, particularly enriched doughs with butter and eggs, it can take longer, what Ciril Hitz calls an "intensive mix". These are done for 4 to 15 minutes longer than an initial mix USING A MIXER, so it will take much longer by hand.
So if you knead by hand as I do, do a set of knead/rest stages. Knead for 5 minutes, rest for 5 minutes, knead for 5 minutes, rest for 5 minutes until your dough no longer wants to rip.
There is a great page over at Wild Yeast that shows the different stages of gluten development, they also illustrate what the different mixes look like.
Tacky, Not Sticky Dough
Dough should generally be sticky, not tacky. It's "tacky" when the dough clings a bit to your hand, but does not leave a lot of residue when pulled away. I cannot explain it any better than the Yumarama blog did on their page. I have copied the page below, all text and photo credit to them.
Posted by Paul | Posted in Techniques and Tips | Posted on 10-10-2009
For those who wonder how you can tell the difference between those two states of your dough, here’s a simple explanation with visuals that should clarify the differences.
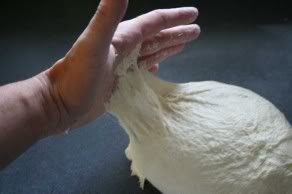
STICKY: Pressing your hand in the dough, it sticks and stretches. When it does release, your hand is still covered in a fair bit of dough. This would be acceptable for soft doughs like Ciabatta.
TACKY: Although pressing your hand on the dough is still causing it to stick, it easily releases without leaving much if any dough on your hand.
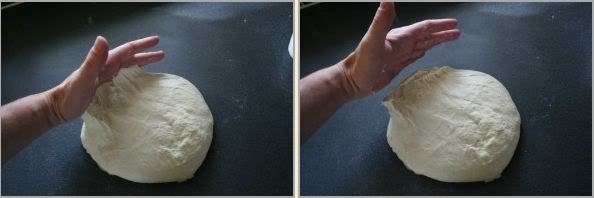
Be careful not to go too far, a little sticky is good, you do not usually want it to be completely non-sticky. That would mean your dough is too dry. Try to avoid the idea that you need to keep your hands “clean” of dough, this is bread making and it should generally be expected to be a little gummy. That’s OK. If you’re aiming for a clean dough, you’ll have a tight, dense bread.
This is fine if you’re making bagels which you want to be a little dense but, generally, not the aim for most breads, some even want to be very soft and sticky to produce the right crumb.
So don’t try for “neatness”. There will be and should be a little mess. If this goes against your personal values… you’ll need to fight that urge.
You may find that kneading on the counter, you constantly keep adding a little more flour to keep the dough from sticking to the surface but again, this can cause problems. I generally knead on the bare counter and, yes, it is sometimes sticky for the first few minutes. Using a scraper, I can collect the stuck dough and get it back into production and as I work, the gluten develops and the dough becomes less sticky without needing to add extra flour.
When in doubt, aim for wetter than dryer.Making Your Sourdough More Sour
My sourdough bread is sour, but not tangy enough in my opinion. My family, who doesn't like sourdough, thinks it's fine but I want more!
In an online search, I found this fantastic post by "JMonkey" on how to make your sourdough starter more sour. As it is the best explanation I have found so far, including explanations of starter hydrations, I am copying it here. All the credit for text and photos goes to "JMonkey" over at "The Fresh Loaf". I urge you to check out the original post as there are comments posted below that are also very informative!
Lesson: Squeeze more sour from your sourdough
I am far from a sourdough expert. I’ve only been baking sourdough since February, and I still have a lot to learn about shaping, scoring and proofing to perfection.
However, there is one thing I have learned well: how to squeeze more flavor out of my naturally sweet starter. Here's the basic tips.
1) Keep the starter stiff
2) Spike your white starter with whole rye
3) Use starter that is well-fed
4) Keep the dough cool
5) Extend the rise by degassing
6) Proof the shaped loaves overnight in the fridge
It’s a common lament that I see on bread baking forums – Why isn’t my sourdough sour?
Personally, I blame Watertown. My evidence? I gave some of my starter to a friend who lives six miles away in Lexington. Within 6 weeks, she was making sour tasting sourdough. Her local yeastie beasties are clearly more sour than mine.
I don’t know what it is about the microflora that live in the little hollow between the hills that I occupy in Watertown, Mass., but treated traditionally, my white starter and my whole wheat starter pack as much sour taste as a loaf of Wonder Bread. That’s not to say that the loaves don’t taste nice. They do. They’re wheaty with a touch of a buttery aftertaste.
But they don’t taste sour, which is how I think sourdough ought to taste.
Anyway, I’ve finally figured out how to get the tangy loaves I love. If you’re facing the same sweet trouble as me, perhaps some (or all) of these tips will help.
1) Keep your starter stiff:
Traditionally, sourdough starter is kept as a batter. The most common consistency is to have equal weights of water and flour, also known as 100% hydration because the water weight is equal to 100% of the flour weight. That’s roughly 1 scant cup of flour to about ½ cup of water. Jeffrey Hammelman keeps his at 125%, and quite a few folks keep theirs at 200% (1 cup water to 1 cup flour).
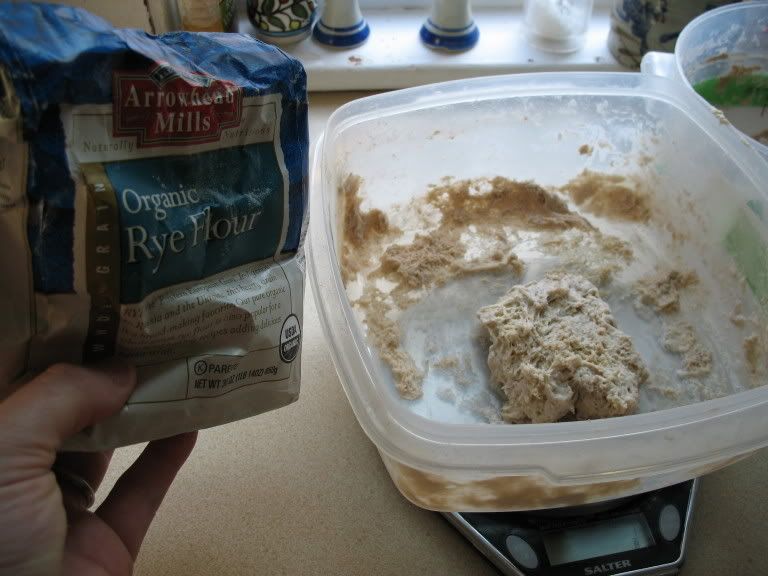
I keep my sourdough starter at 50% hydration, meaning that for every 2 units of flour weight, I add 1 unit of water.
Barney Barm, my white starter is on the left; Arthur the whole wheat starter on the right. The bran and germ in whole wheat absorb a lot of water, so that starter is even stiffer than the white.
There are two basic types of bacteria that flourish in a sourdough starter. One produces lactic acid, which gives the bread a smooth taste, sort of like yogurt. It does best in wet, warm environment. The other makes acetic acid, the acid that gives bread its sharp tang. These bacteria prefer a drier, cooler environment.
(Or so I've read, anyway. I ain't no biochemist; I just know what they print in them books.)
A hydration of 50% is pretty stiff, especially for a whole-wheat starter. You really have to knead strongly to convince the starter to incorporate all the flour.
For example, here's my white starter after I've done my best to mix it up in the bucket. Time to knead a bit.

Here's what it looks like after kneading.
And here's what it looks like 5 hours later once it's ripe.
Conversion from 100% to 50% isn't hard to do if you've got a kitchen scale.
Take 2 ounces of your 100% starter. Then add 5 ounces of flour and 2 ounces of water. This should give you 9 ounces of starter. Leave it overnight, and it should be ripened in the morning.
From there on out when you feed it, add 1 unit of water for every 2 units of flour. I'd recommend feeding it 2 or 3 more times before using it, though, so that the yeast and bacteria can acclimate to the new environment.
There are additional advantages to a stiff starter beyond producing a more sour bread.
First, a stiff starter is easier to transport. Just throw a hunk into a bag, and you’re done.
Supposedly, the stiff stuff keeps longer than the batters. You can leave stiff starter in the fridge for months, or so I hear, and it can still be revived. Never tried it myself, though, so don't take my word for it.
Finally, the math for feeding is easy at 50% hydration, much easier than 60% or 65%. Just feed your starter in multiples of threes. For example, if I’ve got 3 ounces of starter and I need to feed it, I'll probably triple it in size. To get six additional ounces for food, I just add 4 ounces flour and 2 ounces water. Piece of cake.
Converting recipes isn’t hard either. First, figure out the total water weight and total flour weight in the original recipe, including what's in the starter. If the recipe calls for a 100% hydration starter, then half of the starter is flour and the other half is water. Divide it accordingly to get the total flour and total water weights in the final dough.
Now, add the total water and total flour together. Take that figure and multiply by 0.30. This will tell you how much stiff starter you’ll need.
Last, subtract the amount of water in the stiff starter from the total water in the final dough, and the amount of flour in the stiff starter from the total flour in the final dough. The results tell you how much flour and water to add to the starter to get the final dough. Everything else remains the same.
2) Spike your white starter with whole rye flour:
It doesn’t take much. Currently, my white starter is about 10-15% whole rye. Basically, for every 3 ounces of white flour that I feed the starter, I replace ½ ounce with whole rye. That small portion of rye makes a big difference in flavor. Rye is to sourdough microflora as spinach is to Popeye. It’s super-food that’s easily digestible and nutrient rich. That’s why so many recipes for getting a starter going from scratch suggest you start with whole rye.
Here I am, about to add rye to "Barney Barm," my white starter. I haven’t added rye to my whole-wheat starter, though. It hasn’t needed it – there’s more than enough nutrients in the whole wheat to keep the starter party going strong.
3) Use starter that is well fed:
Early in my search to sour my sourdough, I’d read that, if you leave a starter unfed and on the counter for a few days before baking, it will make your bread more sour.
I’ve found that’s not the case. The starter gets more sour, but the bread doesn’t taste very sour at all.
The better course is to take your starter out of the fridge at least a couple of days before you use it, and then feed it two or three times before you make the final dough. Healthy microflora make a more flavourful bread.
4) Keep the dough cool:
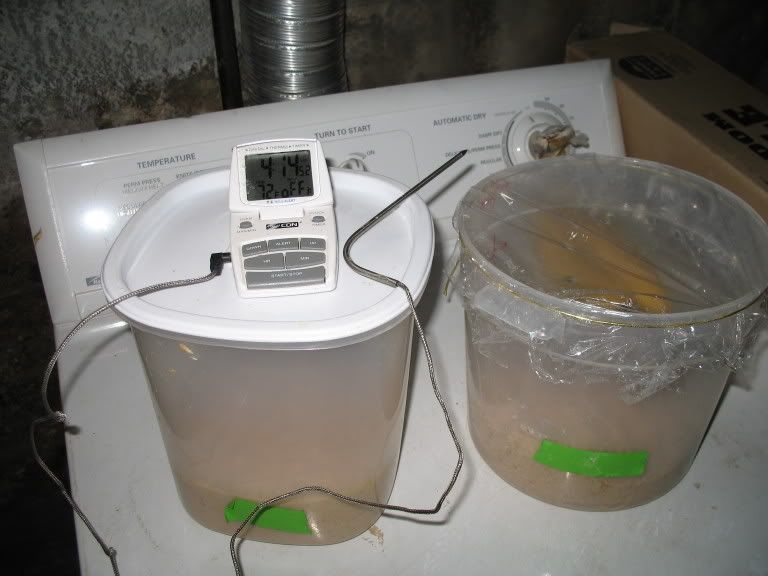
When I first started out, I was following recipes that called for the dough to be at 79 degrees, and I’d often put it in a fairly warm place to rise. Warmth kills sour taste. Nowadays, I add water that’s room temperature, not warmed, and aim for a much cooler rise, no higher than 75 degrees and often as low as 64.
The cellar is your friend.
5) Extend the rise by degassing:
When I make whole wheat sourdough, I usually let the dough rise until it has doubled and then degass it by folding until it rises a second time. Along with cool dough, this means the bulk fermentation usually lasts 5-6 hours.
When I’m making pain au levain or some other white flour sourdough, I usually have the dough very wet, so it needs more than one fold to give it the strength it needs. In this case, I fold once at 90 minutes and then again after another 90 minutes. Usually, the full bulk rise lasts about 5 hours.
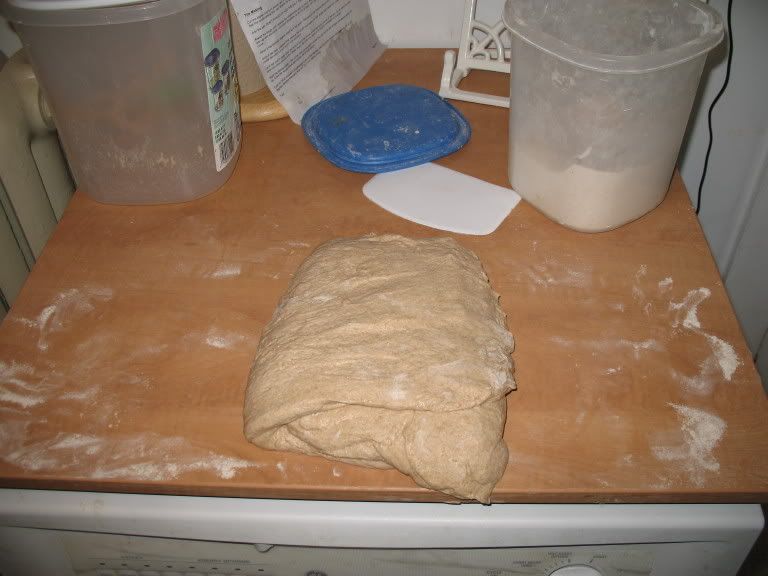
Here's a sequence showing how I fold my whole-wheat sourdough.
First, turn the risen dough out on a lightly floured surface (heavily floured if your dough is very wet).
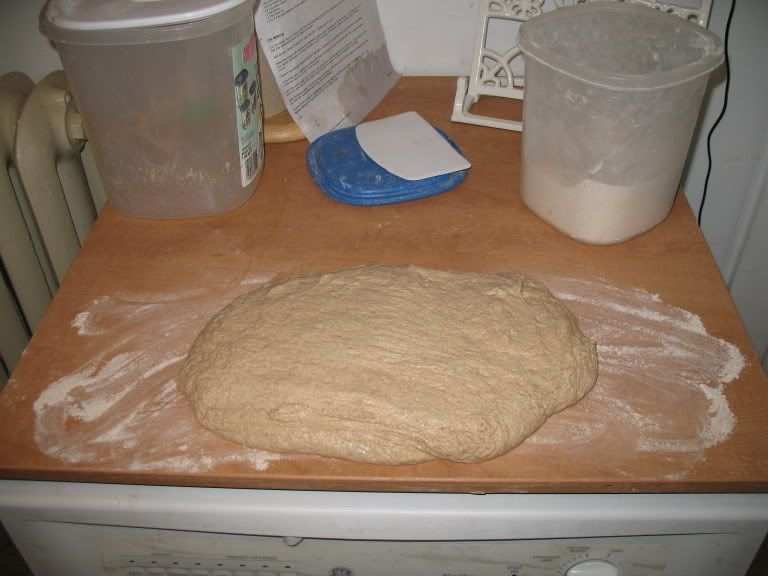
Stretch it to about twice its length.
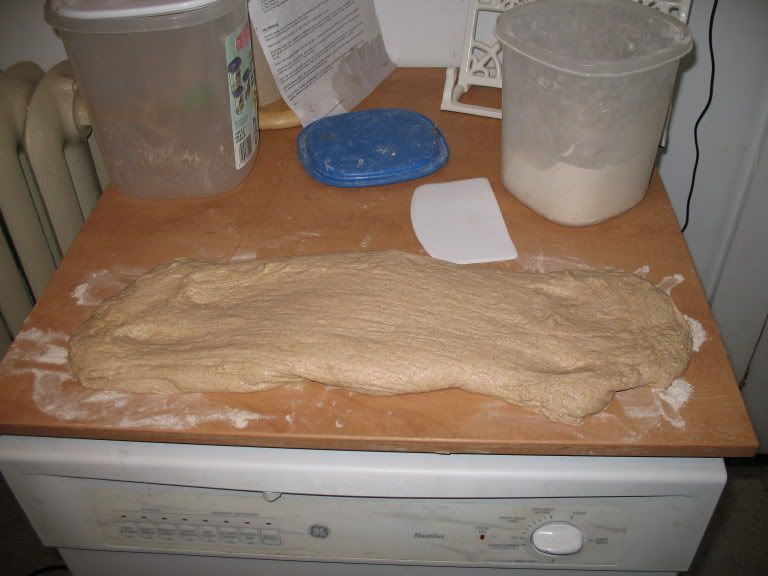
Gently degass one-third of the dough, fold it over the middle, and degass the middle section to seal.
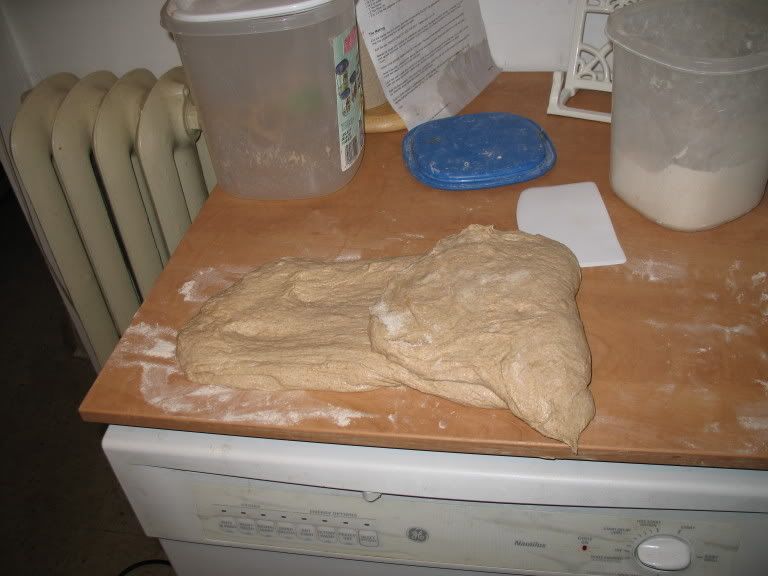
Do the same for the remaining side. Take the folded dough, turn it one-quarter, and fold once more before returning to the bowl or bucket to rise again.
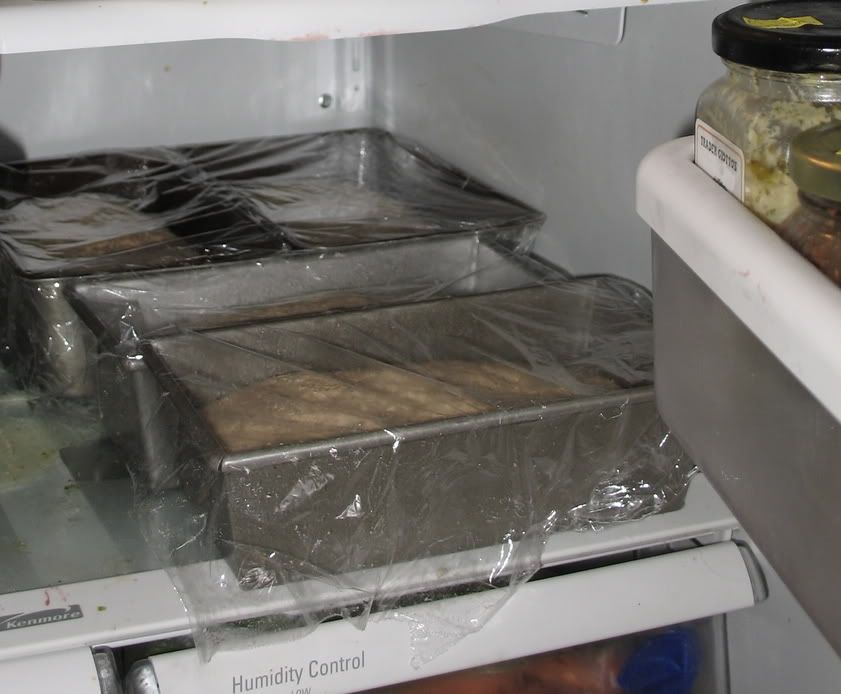
6) Proof the shaped loaves overnight in the fridge:
This final touch really brings out the flavor. So much so that, if you’ve incorporated all the other suggestions, proofing overnight might make your bread a bit too sour for your taste. My wife and I like it assertively sour, however, so this step is a must.
Normally, I’d suggest proofing your loaves on the top shelf where it’s warmest, so as not to kill off any yeast, but I find that if I put my loaves in the top, they’re ready in about 4-6 hours, at which time I’m usually sound asleep. So I started putting them in the bottom, and had better luck.
I hope this helps those of you who dread pulling another beautiful loaf from the oven, only to find it looks better than it tastes. Best of luck!