
While on a vacation two weeks ago, I discovered a copy of The River Cottage Bread Handbook by Daniel Stevens in Barnes & Noble. It has rapidly become one of my favourite books, on par with The Tassajara Bread Book.
Both of these books take a more relaxed attitude toward breadmaking than Peter Reinhart or Jeffery Hamelman, whose books I also picked up on the same trip. "A handful of extras", "hand kneading may take 10 to 15 minutes", "add more water or flour as needed to make a smooth satiny dough" - I find this easier to work with than exact measurements, believe it or not.
The instructions for making bread are simple, despite being four pages long, but they are in depth step by step instructions, similar to the ones found in The Tassajara Bread Book. And the steps for making a sourdough starter are just what I need to attempt making one of my own! If you haven't seen this book, I urge you to seek out a copy and see if it's a book that you can use. I'll be working my way through my copy with delight.
I halved the recipe to make 1 loaf, but these are the multi loaf instructions. Also, it's been shaped into a sandwich loaf. I have left out the ingredients not used, such as optional fruit and nuts, old dough or sourdough starter, fat, coatings and glazes. For the original instructions (not mine), refer to the book.
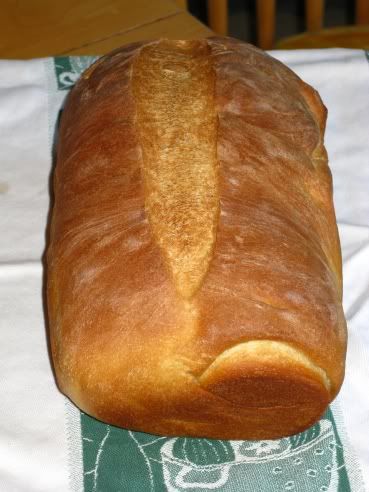
River Cottage Basic Bread - Simple White Loaf
The River Cottage Bread Handbook
makes 2 large or 3 small loaves, or 12 rolls
Essential:
8 cups of flour (2 lbs, 3oz, 1 kg) flour (I used all white)
1 tbs instant yeast (0.35 oz, 10g)
4 tsp (.07 oz, 20g) fine sea salt (I used table salt)
2 1/2 cups warm liquid (I used water)
Optional:
1/3 cup dry milk powder (my personal addition)
In a large bowl, add water, sprinkle with yeast. Add dry milk powder and whisk it until mixed and frothy.
Add the flour, one cup at a time, combining thoroughly after each addition. Use a stiff spoon when needed. Add more liquid or flour to make a soft, easily kneadable dough.*
Turn the dough out onto a kneading surface.
Knead the dough until it's as smooth and satiny as you can make it, 10 to 15 minutes by hand. I stopped and let it rest for about 5 minutes during the kneading process, I found it helps.
Shape the dough into a round, then return to the now greased workbowl, turning the dough to coat. Cover in plastic wrap and let rise 45 to 90 minutes or more until doubled in size.
Deflate the dough. At this point you can either let it rise again (up to 4 times to improve taste and texture), or go directly to shaping it for the final rise and bake.
Shape the loaf into a log, and place into greased 9x5 baking pan. Let rise 45 minutes to 60 minutes.
Preheat oven to 400F. When dough is sufficiently risen, place in to the oven and bake for 10 minutes at 400F. After 10 minutes, turn oven down to 350F and bake for 35 to 40 minutes longer.
Remove from oven and let cool before eating.
*My dough was firm, I used a plant mister to mist my dough twice while kneading the dough. I liked the firm dough.
Submitting to Yeastspotting. :)
No comments:
Post a Comment