
I'm the first one to admit I should have waited a few more days to use the sourdough starter I created last week, but it looked so good, and seemed really active with a nice apple-y vinegar smell that I just couldn't wait.
I should have waited.
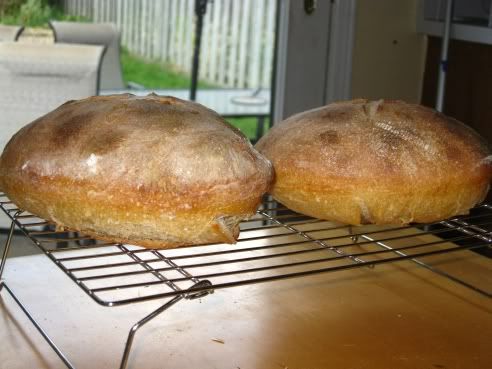
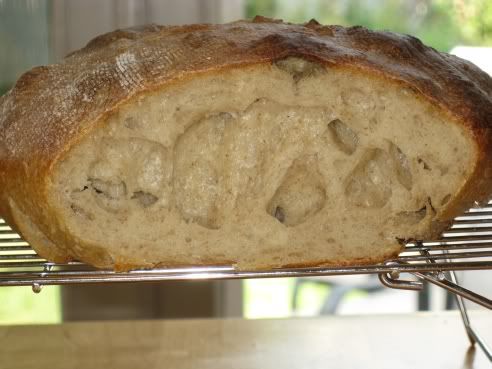
It's not that the loaves came out terrible, although they are cooling right now so I haven't had the change to taste them, they just didn't have the "oomph" required to lift them nicely. I guess the starter wasn't powerful enough.
I've put my rye starter in the fridge to develop more slowly, hopefully it will improve the flavour.
The recipe below takes about 8 hours to make, not including the sponge set up the night before. Plan ahead and clear your schedule!
River Cottage Sourdough
The River Cottage Bread Handbook
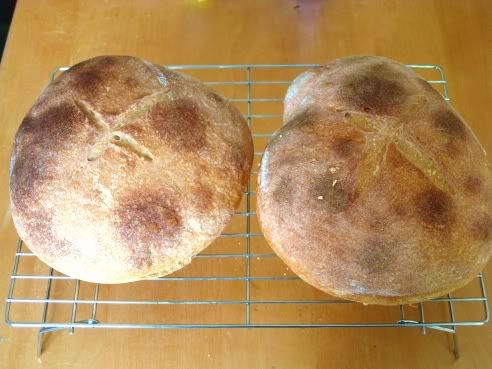
makes 2 smallish loaves
Sponge:
2 3/4 cup warm water
4 cups white unbleached flour (500 grams)
A ladleful of your sourdough starter (1/2 cup to 1 cup), I used 1 cup of starter
For the dough:
4 3/4 cups white unbleached flour (600 grams)
5 tsp fine sea salt (I used table salt)
The night before baking, at bedtime, make the sponge. Mix flour, water and starter in a bowl. Cover and leave in a warmish spot in the house overnight.
The next morning, mix the flour and salt into the sponge. The dough should be soft and sticky, just kneadable but a bit wetter than usual dough. Flour your hands and the work surface and begin to knead the dough. It will be messy, scrape the board and your hands every so often. You can add a bit more flour, but do so sparingly as to not make the dough too floury and lose the nice hole-y texture we're aiming for.
When you dough is smooth and satin-y, shape it into a nice tight ball and replace in the bowl. Cover and let rest 1 hour.
After 1 hour, remove from the bowl, press the dough out flat and flatten slightly with your fingertips. Shape back into a tight ball and replace in the bowl, recover and let rise 1 hour. Do this twice more, for a total of 4 risings (4 hours). Each time your dough should feel smoother and more airy, although I don't think mine did.
After the series of 4 risings, your dough should feel soft and pillowy (again, I think mine didn't). Deflate and divide into 2 or 3 pieces.
Shape the rounds into tight balls and place where you are rising the doughs. I put mine into cheescloth lined wicker baskets I got on vacation in the dollar store. Cover the whole thing with plastic, I stuck mine into a large composting bag and clamped it shut to retain heat.
Let rise 2 to 3 hours, or untiled doubled in size. I rose mine 3 hours and they didn't double.
Towards the end of the rising, preheat oven to 500F. There are instructions for using a baking stone and steam tray, but I didn't use those.
Prepare a large cookie sheet with parchment paper, spraying it with water. When the dough is risen to your satisfaction, place it on the cookie sheet and spray with water. Slash the tops and bake for 10 minutes. After 10 minutes, turn down the oven to 400F if light crusted, 350F if crust is browning, 325F is crust is browning too quickly. Bake for 30- 40 minutes for small loaves, 40 to 50 minutes for bigger loaves. Or until done to your satisfaction. I baked mine for 40 minutes.
Cool on wire rack.
Submitting to Yeastspotting because I tried..
No comments:
Post a Comment